14.8.08

wall & window framing: 1

once all the tubing was run under the first floor, it became obvious that the most pressing issue was window and interior framing.  the entire floor plan is being changed and most of the widows are also changing in both size and location, hence, lots of framing needed to be done before the trades (electrical and plumbing) could go in.  

here's tom taking out the old row of windows in the kitchen to make space for the pantry as well as the new widow opening.  i'm actually making the window quite a bit smaller to accommodate the walk in pantry. (which will be on the right side of that gaping hole)


here goes nothing.  now i have never framed a window or a wall, but i did read a book about it...it's actually not all that hard as long as you can read a tape measure and cut wood to a desired length, a job which tom proved quite adept at.

here's the pantry framed it.  its about 6' deep by 4' wide, not huge, but plenty big for what i need.  the door for the pantry is going to be a sliding door which will hang from some sort of industrial metal track, at least that's the current plan...

PEX wrestling: round 1

by this time all the new subfloors have been put in and so it was on to the heating system...i am going to be putting in a in-floor radiant heat systems as opposed to the more traditional forced air system.  a lot of the time these type of heating systems are cast into a concrete floor, but it's also possible to tack the PEX tubing the the underside of the subfloor with aluminum 'fins' (which transfer the heat).  i got the system from a company called Radiantec, which does the design as well as the fabrication of all the complex manifold components.  It states that it can be installed by a 'reasonably competent handyman', which i assume myself to be, but this, as with everything has been more difficult than expected....big surprise.
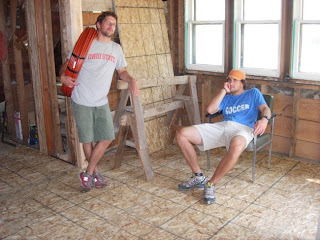
don't we look excited to get this underway.


here's tom pulling some of the PEX tubing in the basement.  i suppose the most difficult thing about this process is working with such long lengths of tubes.  it came from Radiantec in 250' sections, so that's what we generally started with.  the other factor is the rigidity of this stuff... it was described by tom as a 'tornado', which really is pretty accurate. 

not all the house has a walkable basement, this part was the least fun...

5.8.08

true construction hero: tom.

now this guy knows how to get things done... this is my brother, normally all the work his tender little hands get is some keyboard pounding so this really put him to the test.  it took him some time to learn to read a tape measure in less that 2 min, but he picked it up pretty quick and i certainly wouldn't be as far along as i am right now if he hadn't been here working with me for a month.  thank tom.

may this be my last time ...

once the addition and roof were complete and there was no longer and flooding happening in the house it was time for the final floor tearout/rebuild.  removing the original planks from the floor was a quite a bit of work as they pretty much splintered when pried upon, but the joists cut out pretty easy with the sawzall.  please notice the sweet blue paint on the basement walls, again confirming the fact that bad taste truly did live here...

installing the joists went pretty well, but they did need to be notched in a couple of places so they would match up with the other new joists as well as produce a level floor.  since the span is pretty much the same as the great room, 2x10's were used and were set on the sill plate and tacked to the side of the previously installed joists.

i hate blocking.

there is truly nothing better than a nail gun for installing subfloor.  however, hitting the joists is more difficult than it may seem, at least for a novice like myself.    

overall, the subfloor in the entire house turned out pretty well.  they certainly improved as i went along and this one was probably the best.